Showing posts with label chocolate. Show all posts

Friday, December 24, 2010

The Best Yule Tide Log Ever

As it's Christmas Eve and we are going to a friends for Christmas day I have decided to make a Yule Log to take with us. This recipe I found last year and could hardly believe how delicious it was - I certainly did not want to share it with anyone. So I am making it again this year with a slight twist as I am using gluten free flour so Keeley will be able to eat it.

The recipe is from Mary Codogan, I have copied the recipe below, you can also view it here. Thanks to Daphne for lending me her pan and oven to cook this in. :)

The Recipe - Mary Codogan's Chocolate Yule Log
Butter, for greasing
5 eggs
140g light muscovado sugar
100g self-raising flour
25g good quality cocoa powder
caster sugar, for dusting
For the icing and filling
285ml/9½fl oz carton double cream
450g fondant chocolate , such as Lindt Lindor
icing sugar, for dusting
Method
  1. Heat oven to 190C/fan 170C/gas 5. Butter and line the base and sides of a 30 x 35cm Swiss roll tin with baking parchment. 
  2. Separate the eggs, putting them into two large mixing bowls. Add the sugar and 2 tbsp water to the egg yolks. Using an electric whisk or tabletop mixer, whisk the sugar and yolks for about 5 mins until the mixture is light in colour and thick enough to leave a trail when the whisk blades are lifted. Sift in the flour and cocoa, then fold in lightly, using the whisk blades or a large metal spoon.
  3.  Using a clean whisk, beat the egg whites until they are stiff, then fold into the cake mixture in three batches, again using the blades to preserve as much air as possible. 
  4. Pour the mixture evenly over the prepared tin, then carefully spread to the edges. Bake for 10-12 minutes, or until the cake feels firm to the touch. Put a large sheet of baking parchment on the work surface and sprinkle lightly with caster sugar. Turn the cake out onto the parchment and peel off the lining paper. Cover with a clean tea towel, then leave to cool completely. Trim a little cake from all the edges, then score along the edge of one of the long sides of the cake and roll up from there, using the paper to help you, rolling the paper inside the cake.
  5.  To make the icing and filling, bring the cream to the boil in a small pan, remove from the heat, then break in 400g of the chocolate. Stir until it is melted and smooth. Leave to cool, then chill until it is spreadable, about 1 hr. Chop the remaining chocolate, spoon a third of the icing into a bowl, then stir them together to make the filling. 
  6. Carefully unroll the cake, then spread all the filling over to within 2cm of the edges. Roll up the cake again using the paper to help you, then set on a board. 
  7. Cut a thick diagonal slice off one end of the cake. Transfer the larger piece of cake to a board or flat serving plate. Spread a little icing over cut side of the small piece of cake and fix it to the large roll to make a stump (as photo). Spread remaining icing over the cake, then dust with icing sugar to serve.
One thing to note about this recipe is that the icing and filling gets quite soft when the weather is hot like it is today, as soon as I had covered the log I whipped it back into the fridge to allow it to set a little before dusting or serving.

Miechey's Amazing Chocolate Gluten Free Brownies

I stumbled upon a Nigel Slater brownie recipe a couple of years ago - it had promises of being as thick as Glastonbury mud and I have never looked back since. I have adapted his recipe to make it gluten free and it is delicious, once you have tried this recipe you will never stray from it. I have since tried many more but always with regret at the end result - nothing comes even close.

I am baking these brownies as part of a Christmas gift to Keeley who is gluten free and her husband Tom who have kindly invited me and Andy over to spend Christmas day with them.

The Recipe - Miechey's Amazing Chocolate Brownies
300g caster sugar
250g butter
250g dark chocolate (70% cocoa solids or higher)
3 eggs + 1 yolk
60g coconut flour
60g cocoa powder
50g white chocolate

The Method
  1. Preheat the oven to 180 degrees C and grease and line a rectangular tin.
  2. Melt 200g dark chocolate in a bowl over a pan of simmering water, once melted remove from the heat and allow to cool slightly.
  3. Beat the sugar and butter together until light and creamy. Add the eggs a little at a time until well mixed.
  4. Sift the flour and cocoa powder into the butter mixture and mix well.
  5. Chop the remaining dark and white chocolate into gravel sized pieces. Poor the melted chocolate an chocolate chips into the mixture and mix thoroughly.
  6. Poor the mixture into the prepared tin and bake for 30-45 minutes. It should still have a slight wobble and the crumbs should be moist but not wet when you insert a skewer.
  7. Allow to cool in the tin, cut into squares and chill.

Wednesday, September 22, 2010

Melt and Mix Chocolate Cake

The lovely girls at work bought me a perfect gift for my birthday a new Chocolate cookbook!! Its called Chocolate a Fine Selection of Sweet Treats by Murdoch Books and I've been eager to try one of the beautifully laid out and photographed recipe's. As usual I spend more time trying to decide on what to bake than actually baking it. I decided on a cup cake recipe so that I could take it into work to share.

The Recipe - Melt and Mix Chocolate Cakes
Makes 12
150g unsalted butter, cubed
230g soft brown sugar
185ml freshly made espresso coffee
2 eggs, at room temperature, lightly whisked
125g self raising flour
30g plain flour
60g unsweetened cocoa
1/4 tsp bicarb of soda
icing sugar sifted for dusting

chocolate butter cream
250g icing sugar, sifted
2 tbsp unsweetened cocoa
60g unsalted butter, softened
2 tbsp hot water

The Method
Preheat the oven to 180 degrees C. line a 12 hole standard muffin tin with paper cases.

Combine the butter, sugar and coffee in a saucepan over a  medium heat. Stir until the butter has melted  and the sugar has dissolved. Remove from the heat and cool slightly.

Whisk the eggs into the butter mixture. In a separate bowl sift together the flours, cocoa and bicarb. Stir half of the flour mixture into the butter mixture until just combined. Add the remaining of the flour mixture and stir until just combined. Transfer the mixture to a jug and poor into the prepared tin. Bake for 20 minutes or until a skewer  comes out clean once inserted into the muffins. Allow the cakes to cool in the tin for 3 minutes and then transfer to a wire rack to cool completely.

To make the chocolate butter cream, place 125g of the icing sugar in a large bowl, add the cocoa and water and beat wit electric beaters until smooth and creamy. Gradually add the remaining sugar and beat until the butter cream is thick.

Spread the butter over the cooled cakes with a spatula or a flat bladed knife.

the un-iced cakes will store in a airtight container for up to 5 days or up to 2 once iced.

This recipe was dead simple, I love the kind of cakes  you can make in a pan, they always turn out alight and delicious and are not a problem when beating by hand like always used to.

Monday, September 20, 2010

Chocolate Balls of Goodness

For a treat over the weekend I asked my new hubby what he would like me to bake, he chose profiteroles so I used a cookbook he gave me for Christmas one year (Hotel Chocolat 101 Best Loved Chocolate Recipes) and made Terry Laybourne's Profiteroles with Hot Chocolate Sauce. It was a dead simple recipe with an impressive result.

The Recipe Terry Laybourne's Profiteroles with Hot Chocolate Sauce from Hotel Chocolat 101 Best Loved Chocolate Recipes
for the choux pastry
125ml water
125ml milk
1/2 tsp salt
1/2 tsp sugar
100g unsalted butter
150g strong plain flour, sifted
4 eggs, beaten

for the filling
500ml vanilla or pistachio ice cream

for the chocolate sauce
100g dark chocolate
75ml milk
1 tbsp double cream
1 tbsp sugar
1 tbsp softened butter

The Method
To make the choux pastry, put the water, milk, salt, sugar and butter into a medium saucepan. Bring to the boil, take off the heat and immediately add all of the flour in one go, stirring well. return to the heat and beat vigorously until smooth. Continue cooking over a medium heat for a minute or two until the paste leaves the sides of the pan. Remove from the heat and allow to cool for 3 minutes.

Weigh 200g of the beaten eggs. begin adding the egg to the mixture a little at a time, beating well between each addition. Once it is all incorporated, the choux pastry should be smooth, shiny and thick enough to pipe.

Preheat the oven to 200 degrees C and grease a large baking tray. Put the choux pastry in a piping bag with a 12mm plain nozzle. Pipe 18 small mounds onto the baking tray, spacing them well apart. Bake for 10 minutes, lower the heat of the oven to 140 degrees C and bake for a further 20 minutes. transfer to a wire rack to cool.

For the sauce, melt the chocolate in a bowl over a pan of simmering water. put the cream, milk and sugar into a pan. Bring to the boil. pour onto the melted chocolate, stirring well. return to the pan and bring just back to boil, take off the heat and whisk in the butter. Keep warm.

To assemble cut each choux bun in half and return to the oven for 3 minutes. Divide the choux bases between serving plates , allowing 3 per portion. Put a ball of ice cream on each base and top with the lids. Spoon hot chocolate sauce over the profiteroles and serve immediately.

I actually used fresh cream instead of ice cream and the turned out beautiful, the sauce is rich and delicious. I will be making this one again. I made my profiteroles slightly smaller and got more like 30 out of them.


Tuesday, August 31, 2010

Not my 'Favourite Chocolate Cake'

I was looking for a chocolate cake for my Bank Holiday BBQ, something rich and dense and finally picked Patrick Anthony's 'Favourite Chocolate Cake' from Hotel Chocolat 101 Best-Loved Chocolate Recipes.


Its definitely not my favourite chocolate cake, but this could have been the oven I was using cooking a little high. My cake looked like a mountain range and was a bit dry, his recipe states to serve with a raspberry ice cream which would have finished this off but I didn't have the time to make it.


The Recipe - Patrick Anthony's Favourite Chocolate Cake (from Hotel Chocolat 101 Best-Loved Chocolate Recipes)
A little oil to grease the pan
225g dark chocolate, (70% +), in pieces
110g butter
225g caster sugar
4 large eggs
3 tbsp whisky, rum or orange liqueur
2 heaped tsp plain flour
50g walnuts or pecans, chopped (optional - I didn't use these)
cocoa powder and icing sugar to dust


Pre-heat the oven to 190 degrees C. Lightly oil a 23cm springform cake tin, at least 8cm deep.


Melt the chocolate and butter together in a heavy-based saucepan over a gentle heat, giving an occasional stir. Remove the pan from the heat and stir in the sugar. Next, add the eggs and beat into the mixture. Add your choice of booze, plus the flour and stir until well blended. Add the nits if using and stir to distribute.


Pour the mixture into the prepared tin and bake at the centre of the oven for 30 minutes. The cake will rise and sink back down and it might crack. Run a knife around the edge of the cake and leave in the tin for 10 minutes, then release the tin and place on a wire rack to cool. 


My cake looked like a hilly landscape and did not sink back down, it looked a little better when I had sprinkled cocoa and icing sugar all over it but was not the rich fudgy cake I was hoping for.

Jimmy's Chocolate Scones

Ages ago I found a scone recipe that I have been wanting to try for ages, but could I find it online again? So have found this one instead, as I have a high tea planned in a couple of weeks, so am pre-baking and freezing so I don't have to do so much on the actual day.


The Recipe - Jimmy's Chocolate Scone's


For the scones
1 ¾ c unbleached all-purpose flour
¼ c plus 1 Tbs unsweetened Dutch-process cocoa
2 ¾ tsp baking powder
¼ tsp salt
6 Tbs cold unsalted butter, cut into chunks
1/3 cup granulated sugar
½ cup heavy cream
2 large eggs
2 tsp vanilla
1 cup mini semisweet chocolate chips

For the ganache
8 ounces semisweet chocolate, finely chopped (be sure to choose a good-quality chocolate that you’d enjoy eating on its own)
3/4 cup heavy cream


The Method
Preheat the oven to 200 degrees C. In a large mixing bowl, sift together the flour, cocoa, baking powder, and salt. Drop in the butter, and using a pastry blender or two knives, cut the butter chunks into the flour until they are reduced to pearl-sized nuggets. Stir in the granulated sugar. Set aside.

In a small bowl, whisk together the cream, eggs, and vanilla.

Pour the wet mixture over the dry ingredients, add the chocolate chips, and stir to form a dough. The dough will be firm but moist, and a bit sticky to the touch. Knead the dough lightly in the bowl about ten times—or, as Jimmy has found, if the dough is too sticky, don’t worry about kneading. It is better to undermix than to overmix.

Form the dough into a 7- to 7 ½-inch round disk on a lightly floured surface. Cut the dough into 6 wedges, and using a spatula, transfer the wedges to a baking sheet. Bake the scones for 17-18 minutes, or until set. Remove them to a rack to cool, and set the rack over a rimmed baking sheet.

To make the ganache, place the chopped chocolate in a medium bowl. Heat the heavy cream in a small saucepan until it is very hot and steamy (not boiling, but close), remove it from the heat, and pour it over the chocolate. Whisk until the mixture is smooth and the chocolate is thoroughly melted. Use a spoon to drizzle the ganache over the cooled scones, and serve. [You will have leftover ganache, which can be refrigerated or frozen; the scones also freeze well and are remarkably good cold.


Unfortunately I forgot about the scones whilst tucking into some lunch and slightly over cooked the scones. So my first attempt was not as good as I had hoped, I'll try these again next week when I'm more focussed on the cooking instead of the eating!!

Saturday, August 28, 2010

Chocolate Ricotta Tart

Well I'm now in England and I was hoping to be making a chocolate recipe every day, I have somehow failed at this with the million things I have been trying to fit in!! My cook books all calling me I sat down to try and decide on something to bake. I agonised for ages not having this or that ingredient and then decided upon a Chocolate Ricotta Tart from my Hotel Chocolat 101 Best Loved Chocolate Recipes.


The Recipe - Ed Baines' Chocolate Ricotta Tart


Pasta Frolla
225g plain flour plus extra to dust
pinch salt
100g unsalted butter, diced
30g caster sugar
1 egg, beaten
3 tbsp cold water


Filling
350g ricotta cheese
85g caster sugar
3 eggs
grated zest and juice of 1 lemon
grated zest and juice of 1/2 an orange
60g blanched almonds, finely chopped
60g finely chopped mixed peel (i missed this out as I didn't have any)
4 drops vanilla extract
100g dark chocolate grated


The method
To make the pastry, put the flour salt and butter in a large bowl and rub through with your fingers until the mixture is the consistency of breadcrumbs. Mix in the sugar, then the egg, together with the cold water to make a smooth dough. Knead lightly and gently to ensure a light and crumbly pastry. Form the pastry into a ball, wrap in cling film and chill in the fridge for 30 minutes.


Meanwhile make the filling. Put the ricotta in a sieve to drain off any excess water, then tip into a clean bowl. Gradually beat in the sugar and the eggs, using a wooden spoon. Stir in the citrus zest and juices. Now mix in the almonds and chopped peel and finally the grated chocolate. Cover and chill.


Preheat the oven to 180 degrees. Roll out the pastry on a well floured surface and use to line a 25cm tart tin. Cut away the excess pastry, overhanging the rim.
Pour the ricotta filling into the pastry case and smooth evenly. Bake in the oven for 45-50 minutes, until golden brown on top.


Decorate the tart with chocolate ganache or dust with icing sugar.


This recipe was fairly easy to follow, but the end result just did not resemble the picture in the book. The taste was good, I don't think I got my almonds fine enough, but added to the texture. I did not serve with a ganache, I think this would have improved it as for me it was just not chocolatey enough. More give me more chocolate!! If I were to make this recipe again I might try melting the chocolate instead of grating it, I think this would improve this dessert, plus my pastry recipe I use from Gorgon Ramsay is far nicer.

Sunday, July 11, 2010

Brownie Biased


I'm a fan of everything chocolate, the richer, the better and I absolutely love chocolate brownies, but am quite fussy about them. They have to be rich, dense and preferably only chocolate - I'm definitely not a fan of brownies with nuts! My friends all know one of my favorite sayings 'don't contaminate the chocolate'.

However whenever I go out chocolate brownies is not something I ever order as to be fair I am usually disappointed, they're either too dry, not chocolaty enough or have nuts in them. You see I found a really fantastic brownie recipe by Nigel Slater which I used as my base and changed around a few ingredients and have never looked back. I try not to stray from this recipe as nothing ever compares.

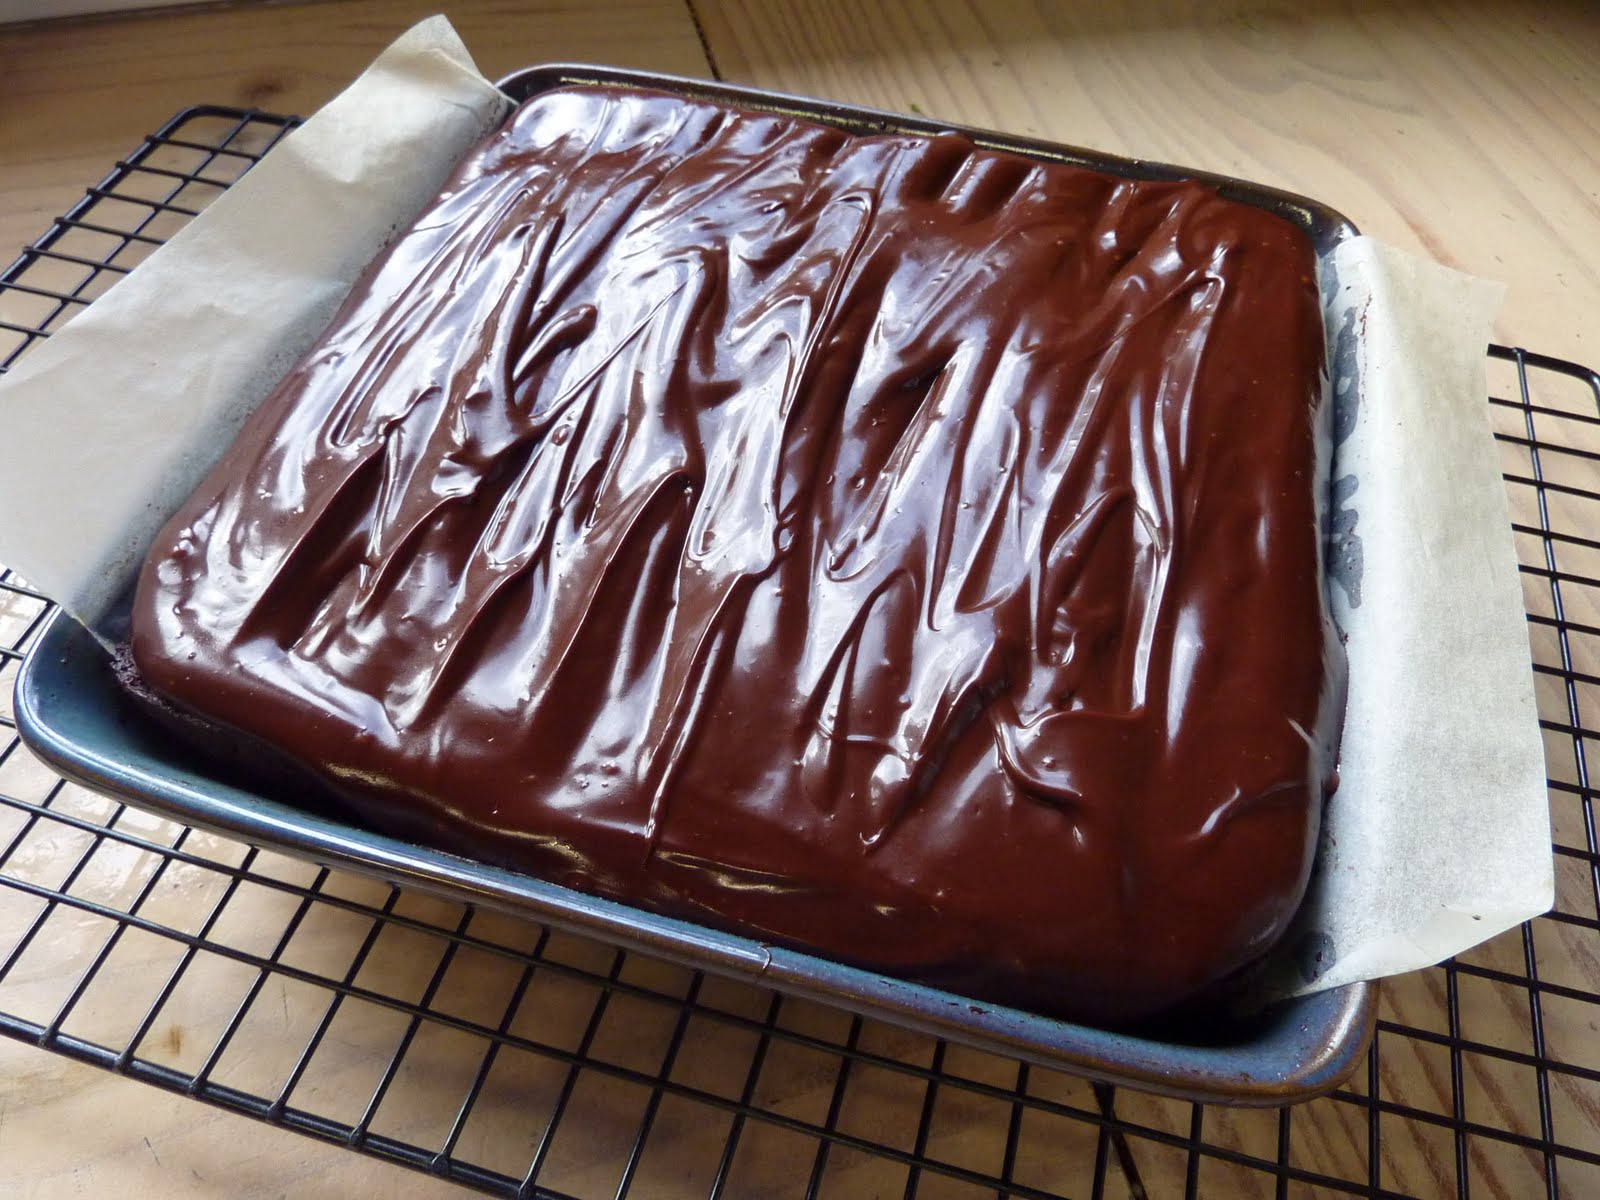
However today on a very windy yet sunny Sunday morning I am going to have a go at making Recipe Girls 'Chocolate Mascarpone Brownies. Will I regret it? I hope not. For a start they look absolutely amazing, dense and fudgey, with a thick chocolate topping so here goes nothing.

The Recipe
1 cup unsalted butter (250 ml)
3 ounces best-quality semi-sweet chocolate, finely chopped (90 g)
1 cup sugar (250 ml)
1/2 cup best-quality cocoa powder (125 ml)
1/2 cup mascarpone cheese, softened (125 ml)
3 eggs
2 teaspoons vanilla extract (10 ml)
1/2 cup flour (125 ml)
1/4 teaspoon fine salt (1 ml)

for the topping - Ganache
6 ounces best-quality semi-sweet chocolate, finely chopped (170 g)
6 tablespoons heavy cream (90 ml)
3 tablespoons unsalted butter (45 ml)

  1. Preheat oven to 325°F. Butter an 8-inch square pyrex pan.
  2. Place chopped chocolate in a mixing bowl; set aside. In a small glass bowl, melt butter in microwave (take it out before it starts bubbling.) Pour butter over the chocolate and let stand for 30 seconds. Stir until chocolate is completely melted. Sift in sugar and cocoa powder.
  3. With a wooden spoon, beat in mascarpone, eggs and vanilla, mixing until smooth. Gently fold in flour and salt.
  4. Pour batter into prepared pan and spread evenly. Place into preheated oven and bake 45 to 50 minutes, or until a tester comes out clean.
  5. Place pan on cooling rack and let brownies cool 10 to 15 minutes while you make the ganache.
  6. Place chopped chocolate in a mixing bowl. In a small saucepan, bring the cream and butter to just below boiling point, over medium heat. Pour this hot mixture over the chocolate and let stand for 30 seconds, then stir until smooth. Pour ganache over brownies while still warm, and spread to cover evenly.
  7. Let ganache firm up before cutting. It’s best to refrigerate them until quite firm. Once the ganache is firm and the brownies have been cut, they do not need to be kept in the refrigerator.
This recipe is from Recipe Girls website: Chocolate Mascarpone Brownies

The recipe was fairly easy to make, I didn't use the microwave method of melting my butter and instead did it in a bain marie and I also lined my dish with a little greaseproof paper as I wanted to ensure the brownies came out easily. I was quite surprised at spreading the warm ganache over a non cooled brownie. In their dish the brownies took quite a while to cool enough for me to put them in the fridge.

As a brownie recipe goes, this one's not bad, it leaves a dense brownie with a delicisou rich topping, and as nice as it is, it's just not as yummy as my recipe, my recipe has more chocolate and different flavour due to the coconut flour.

I'm glad I tried this recipe and will enjoy eating it, but from now on I'll be sticking to my recipe. :)